As mentioned at the concept, i just find the location at Sketchup from Google.
Firstly it just a layer and i using a box to intersect with it can create the "solid" for the contour.
So you can see the contour have slides to "infill" the void under the contour. It is important to do that because the grasshopper will just want a solid model during conversion.
Just to make sure no error occur so i just change all the material to default and shown as white.
So we can start making the mold.
Sketchup direct import into rhino (with .skp file only) and using grasshopper to generate the rib.
The above two imagines showing two different spacing of the ribs. It is important to make sure all the weight of the plaster can evenly distribute onto the mold. It is too risky when the load is uneven and the plaster collapses during further steps. It is also helping to create the contour as best as it could be.
Firstly, prepare the slide board and the base board for the mold itself.
Measured and evenly cut blue foam cut at the office machine and according to the thickness designed in grasshopper.
Laser cut the grasshopper generated template. Just remember to clear before use as the dirt of burn mark will make a mess...
Follow the temple and cut all the parts with blue foam cuter.
Assemble all the parts and it is not as perfect as laser cut in other material cause we have cut them manually. The error makes some part crack or even break the part's joint.
Just staple the join to secure the joint.
Prepare the electronic parts and waitng to install inside the cast.
Prepare the material mesh for structural reinforcement.
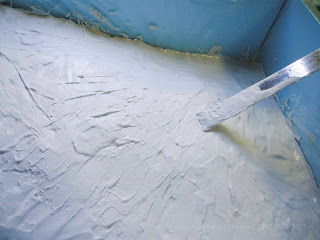
Pour the plaster into the mold and try all the best to even the 1st pour.
Install the mesh and all the electronic after 1st pour so it will be stay at the middle of the base.
This is how it look after 2nd pour.
It is accidentally create a interesting pattern by cling wrap at the bottom of the base.
Install the foundation of the house and the base is finish at this stage. I did keep polish the surface of the contour with sandpaper to make sure it smooth.
Note that it is better to pour the plaster at a sunny dry day. I did it at a rainy day and it seems take longer time to fully dry than i expected.


0 comments:
Speak up your mind
Tell us what you're thinking... !